Chocolate Covered Wafers

Chocolate Covered Wafers — The Easiest “Impressive” Dessert for Any Holiday
Chocolate Covered Wafers are one of the easiest throw together desserts ever. Perfect for adding more to that 4th of July BBQ spread or extra fillers in your Christmas Goody Boxes.
Also these are so easy to dress up for any holiday by just changing the color of your melting chocolates and/or sprinkles. I have done these up for Halloween as an after school snack and Valentines day for a special treat for my girls, but these are always made up at Christmas time for our Goody Boxes that we hand out.
If you haven’t heard about the large amount of Christmas goodies we make as a family please check out some of our other top Christmas recipes like: Russian Tea Cakes, Peanut Butter Kiss Cookies, Peanut Butter Cookies, Christmas Wreath, and the ever famous Caramel Puffcorn.

Why You’ll Make These on Repeat
- Truly quick and easy — from start to finish in under 30 minutes
- No baking required — melt, dip, drizzle, done
- Impressive presentation — they look like something from a chocolate shop
- Completely customizable — change the color and sprinkles for any holiday or occasion
- Great for gifting — perfect for holiday goody boxes, treat bags, and neighbor gifts
- Long shelf life — store in an airtight container for up to a few weeks
- Kid-friendly to make — a wonderful recipe to make with kids for the holidays
The Perfect Easy Holiday Dessert — All Year Long
4th of July: Use red and blue melting chocolate with white sprinkles or red, white, and blue star sprinkles for a festive patriotic treat that fits right in on a 4th of July BBQ dessert spread. They’re also a great no-fuss addition to the dessert table when you want something impressive without spending hours in the kitchen.
Christmas: This is where these wafers truly shine. They’re always in our family’s annual Christmas Goody Boxes — stacked neatly in a box alongside cookies and candies, they’re one of the first things to disappear. Red and green drizzles with festive sprinkles make them look absolutely beautiful. If you love making Christmas goodies, you’ll want to check out some of our other top Christmas recipes too: Russian Tea Cakes, Peanut Butter Kiss Cookies, Peanut Butter Cookies, Christmas Wreath Cookies, and the ever-famous Caramel Puffcorn.
Valentine’s Day: Pink and white chocolate drizzles with heart sprinkles make these a sweet and special treat for the people you love. My girls look forward to these every February.
Halloween: Orange and black chocolate with Halloween sprinkles make an easy after-school snack that feels festive and fun — no candy bowl required.
Thanksgiving: Gold, orange, and brown drizzles with autumn leaf sprinkles turn these into an elegant addition to any Thanksgiving dessert spread.
Easter: Pastel melting chocolates in pink, lavender, and yellow with Easter sprinkles make these a charming addition to an Easter basket or brunch dessert table.
Ingredients:
Note: One standard package of sugar wafer cookies yields about 20-40 finished treats depending on size. (Makes as many as you need — this recipe scales infinitely!)
- Wafer cookies — the smaller square ones give the best uniform look, but the longer standard grocery store wafers work great cut down to size
- Vanilla almond bark or white melting chocolate
- Chocolate almond bark or dark melting chocolate
- Food dye (optional — for tinting white chocolate any color)
- Seasonal sprinkles (optional but highly recommended!)
Ingredient tip: Almond bark and candy melts are more forgiving than real chocolate because they don’t require tempering — they melt smoothly, set quickly, and give you that clean, glossy finish without any fuss. They’re the secret to why these look so professional with so little effort.

How to Make Chocolate Covered Wafers
Step 1 — Melt Your First Chocolate Melt your first chocolate slowly — in the microwave in 30-second intervals, stirring between each, or in a double boiler on the stovetop. Stir constantly and be careful not to overheat, as scorched chocolate can’t be saved. You want it smooth, glossy, and fully melted.
Step 2 — Dip the Wafers Using a fork, dip each wafer cookie into the melted chocolate and let it coat fully. Lift it out and tap the fork gently on the side of the bowl to shake off any excess chocolate. Place on a sheet of parchment paper to harden. Repeat with all your wafers.
Step 3 — Drizzle & Add Sprinkles Once the base chocolate layer has fully hardened, melt your second chocolate (or a food-dyed white chocolate for a pop of holiday color). Drizzle it over each wafer using a fork or a piping bag for more control. Immediately add any sprinkles while the drizzle is still wet so they stick.
Step 4 — Let Harden & Store Allow the drizzle to fully harden at room temperature. Once set, store in an airtight container at room temperature for up to a few weeks — making these an ideal make-ahead holiday dessert that you can prep days before your party or gifting occasion.

Tips for Perfect Chocolate Wafers Every Time
Work in batches: Melt a manageable amount of chocolate at a time so it stays fluid while you work. If it starts to thicken, microwave it in 10-second bursts and stir.
Parchment paper is your best friend: Always work over parchment — it makes cleanup effortless and the wafers pop right off once hardened.
Color your own chocolate: Can’t find colored melting wafers for your holiday? Use white almond bark plus gel food dye to create any color you need. Gel dye works far better than liquid in chocolate — it won’t cause the chocolate to seize.
Package them beautifully: Stack 4–6 in a small cellophane bag tied with a ribbon for an instant, gorgeous homemade gift. They stack neatly in holiday tins and treat boxes too — which is exactly how they earn their place in our Christmas Goody Boxes every year.
Get the kids involved: The drizzling and sprinkle step is perfect for little hands. It doesn’t have to be perfect — the slight imperfections are part of the charm of homemade treats.
Frequently Asked Questions
What kind of wafers work best? The smaller square wafer cookies give the most uniform, neat look and are easier to dip evenly. The longer rectangular wafers available at most grocery stores also work well — just cut them in half or thirds for a more manageable size and consistent presentation.
Can I use real chocolate instead of almond bark? You can, but almond bark and candy melts are much easier for dipping because they melt smoothly and set without tempering. If you use real chocolate, you’ll need to temper it to get a glossy, snappy finish — doable, but more work for what’s meant to be a quick and easy dessert.
How long do they keep? Stored in an airtight container at room temperature, Chocolate Covered Wafers keep well for up to 2–3 weeks — which makes them one of the best make-ahead Christmas treats and holiday gifts around.
Can I freeze them? Yes! Layer them between sheets of parchment paper in a freezer-safe container and freeze for up to 2 months. Thaw at room temperature before serving.
Can I use different flavored almond bark? Absolutely. Peanut butter melting wafers, butterscotch, or mint-flavored almond bark all make delicious and fun variations depending on the season.
More Holiday Favorites to Make Alongside These
If these Chocolate Covered Wafers are going in your Christmas Goody Box or holiday treat spread, here are more of our most-loved recipes to round it out:
And if you’re building a full 4th of July BBQ dessert spread, these wafers are a perfect low-effort addition that fills out the table beautifully alongside bigger showstopper desserts.
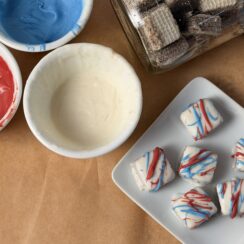
Chocolate Covered Wafers
Ingredients
- Almond Bark or melting chocolate – Vanilla
- Almond Bark or melting chocolate – Chocolate
- Optional : Food Dye
- Optional : Seasonal Sprinkles
Instructions
- Melt Your First Chocolate Melt your first chocolate slowly — in the microwave in 30-second intervals, stirring between each, or in a double boiler on the stove top. Stir constantly and be careful not to overheat, as scorched chocolate can't be saved. You want it smooth, glossy, and fully melted.
- Dip the Wafers Using a fork, dip each wafer cookie into the melted chocolate and let it coat fully. Lift it out and tap the fork gently on the side of the bowl to shake off any excess chocolate. Place on a sheet of parchment paper to harden. Repeat with all your wafers.
- Drizzle & Add Sprinkles Once the base chocolate layer has fully hardened, melt your second chocolate (or a food-dyed white chocolate for a pop of holiday color). Drizzle it over each wafer using a fork or a piping bag for more control. Immediately add any sprinkles while the drizzle is still wet so they stick.
- Let Harden & Store Allow the drizzle to fully harden at room temperature. Once set, store in an airtight container at room temperature for up to a few weeks — making these an ideal make-ahead holiday dessert that you can prep days before your party or gifting occasion.